
- CSS stands for Cascading Style Sheets
- CSS describes how HTML elements are to be displayed on screen, paper, or in other media
- CSS saves a lot of work. It can control the layout of multiple web pages all at once
- External stylesheets are stored in CSS files
- It allows web developers to control the visual aspects of web pages, such as colors, fonts, spacing, and positioning.
What is CSS?
CSS (Cascading Style Sheets) is used to styles web pages. Cascading Style Sheets are fondly referred to as CSS. The reason for using this is to simplify the process of making web pages presentable. It allows you to apply styles on web pages. More importantly, it enables you to do this independently of the HTML that makes up each web page.

CSS
Why learn CSS?
Styling is an essential property for any website. It increases the standards and overall look of the website that makes it easier for the user to interact with it. A website can be made without CSS, as styling is MUST since no user would want to interact with a dull and shabby website. So for knowing Web Development, learning CSS is mandatory.
CSS Code Format: It is the basic structure of the CSS style of a webpage.
body { background-color: lightgray;}h1 { color: green; text-align: center;}p { font-family: sans-serif; font-size: 16px;} |
Types of CSS: There are three types of CSS which are given below.
- Inline: Inline CSS contains the CSS property in the body section attached with the element known as inline CSS.
- Internal or Embedded: The CSS ruleset should be within the HTML file in the head section i.e the CSS is embedded within the HTML file.
- External: External CSS contains a separate CSS file that contains only style property with the help of tag attributes.
Example: Let’s see a small example of HTML webpage with CSS styles. Here, we use styles to set the alignment and text color of a webpage.
<!DOCTYPE html><html><head> <title> Simple webpage </title> <!-- Stylesheet of web page --> <style> body { text-align: center; } h1 { color: green; } </style></head><body> <h1>Welcome to Learn with jay</h1> <p>A computer science portal for geeks</p></body></html> |
Output:

- CSS saves time: You can write CSS once and reuse the same sheet in multiple HTML pages.
- Easy Maintenance: To make a global change simply change the style, and all elements in all the webpages will be updated automatically.
- Search Engines: CSS is considered a clean coding technique, which means search engines won’t have to struggle to “read” its content.
- Superior styles to HTML: CSS has a much wider array of attributes than HTML, so you can give a far better look to your HTML page in comparison to HTML attributes.
- Offline Browsing: CSS can store web applications locally with the help of an offline cache. Using this we can view offline websites.
CSS versions release years: 
CSS Syntax:
CSS comprises style rules that are interpreted by the browser and then applied to the corresponding elements in your document. A style rule set consists of a selector and declaration block.
- Selector: A selector in CSS is used to target and select specific HTML elements to apply styles to.
- Declaration: A declaration in CSS is a combination of a property and its corresponding value.
Selector -- h1
Declaration -- {color:blue;font size:12px;}
- The selector points to the HTML element you want to style.
- The declaration block contains one or more declarations separated by semicolons.
- Each declaration includes a CSS property name and a value, separated by a colon.
For example :
- CSS
CSS declaration always ends with a semicolon, and declaration blocks are surrounded by curly braces.
Here is a more specific example: In the following example all p elements will be centre-aligned, with a blue text colour:
- CSS

Let’s see how our page looks with & without CSS :
Before CSS: In this example, we have not added any CSS.
- html
Output:
Without CSS
After CSS: In this example, we added some CSS styling inside the HTML code only to show how CSS makes a dull HTML page look beautiful.
- html
Output:

A CSS Syntax rule consists of a selector, property, and its value. The selector points to the HTML element where the CSS style is to be applied. The CSS property is separated by semicolons. It is a combination of the selector name followed by the property: value pair that is defined for the specific selector.
Syntax:
selector { Property: value; }For instance, we have declared a heading tag(h1) along with having assigned some property: value pair that is used to style the heading tag. Here, h1 is the selector, { color: green; font-family: sans-serif; } is a declaration block and it can contain one or more declarations separated by semicolons, color: green; is a property: value pair that is applied to the HTML element in order to style them.
                                     Declaration     Declaration
                                h1 { color: green; font-family: sans-serif;}
                                 |      |      |        |            |
                            Selector Property Value   Property      Value
Every declaration has a CSS property name and a value, separated by a colon(:) and is surrounded by curly braces({ }). For declaring the multiple CSS properties, it can be separated by the semicolon(:).
Let’s define each of these :
- Declaration: A combination of a property and its corresponding value.
- Selector: Used to target and select specific HTML elements to apply styles to.
- Property: Defines the specific aspect or characteristic of an element that you want to modify.
- Value: Assigned setting or parameter for a given property, determining how the selected element should appear or behave.
Example: This example illustrates the use of CSS Syntax for the styling of HTML elements.
HTML
Output: In the above code, h1 is the selector of h1 tags, it select the h1 element that you want to style. The color is a property and green is the value of that property, similar text-align is the property and value of that property is center.

CSS :hover Selector
The :hover selector CSS pseudo-class is used to style elements when the mouse hovers over them. It can be used on every element.
We can style the links for unvisited pages using the :link selector, for styling the links to visited pages, use the :visited selector & for styling the active link, use the :active selector. If the :link and :visited selectors are present in the CSS definition then in order to see the effect, we must add :hover selector after it.
Syntax:
element :hover{
    // CSS declarations;
}
Example 1: This example illustrates the changing of the background-color on hover over an element.
- HTML
Output:

Example 2: This example is showing a hidden block on hover over text.
- HTML
Output:

Example 3: This example illustrates the changing of the font-color on hover over an element.
- HTML
Output:

Example 4: This example illustrates the changing of the font-family of text on hover over it.
- HTML
Output:

Example 5: This example illustrates the changing of the text-decoration to underline on hover over an element.
- HTML
Output:

CSS Comments
The Comments in CSS, are the statements in your code that are ignored by the compiler and are not executed. Comments are used to explain the code. They make the program more readable and understandable.
Syntax:
/* content */
Comments can be single-line or multi-line. The /* */ comment syntax can be used for both single and multiline comments. We may use <!– –> syntax for hiding in CSS for older browsers, but this is no longer recommended for use. Adding comments to the code is a good practice that can help to understand the code if someone reads the code or if it is reviewed later.
Note: The outputs are the same because comments are ignored by the browser and are not interpreted.
Example 1: This example describes the single-line comment.
- HTML
Output:

Example 2: This example describes the multi-line comment.
- HTML
Output:

CSS Colors
CSS Color property is used to set the color of HTML elements. This property is used to set font color, background color, etc. The color of an element can be defined in the following ways:
- Built-In Color
- RGB Format
- RGBA Format
- Hexadecimal Notation
- HSL
- HSLA
Built-In Color: These are a set of predefined colors which are used by its name. For example: red, blue, green etc.
Syntax:
h1 {
    color: color-name;
}
Example:
- html
Output:

RGB Format: The RGB(Red, Green, Blue) format is used to define the color of an HTML element by specifying the R, G, B values range between 0 to 255. For example: RGB value of Red color is (255, 0, 0), Green color is (0, 255, 0), Blue color is (0, 0, 255) etc.
Syntax:
h1 {
    color: rgb(R, G, B);
}
Example:
- html
Output:

RGBA Format: The RGBA format is similar to the RGB, but the difference is RGBA contains A (Alpha) which specifies the transparency of elements. The value of alpha lies between 0.0 to 1.0 where 0.0. represents fully transparent and 1.0 represents not transparent.
Syntax:
h1 {
    color:rgba(R, G, B, A);
}
Example:
- html
Output:

Hexadecimal Notation: The hexadecimal notation begins with # symbol followed by 6 characters each ranging from 0 to F. For example: Red #FF0000, Green #00FF00, Blue #0000FF etc.
Syntax:
h1 {
    color:#(0-F)(0-F)(0-F)(0-F)(0-F)(0-F);
}
Example:
- html
Output:
HSL: HSL stands for Hue, Saturation, and Lightness respectively. This format uses the cylindrical coordinate system.
- Hue: Hue is the degree of the color wheel. Its value lies between 0 to 360 where 0 represents red, 120 represents green and 240 represents blue color.
- Saturation: It takes a percentage value, where 100% represents completely saturated, while 0% represents completely unsaturated (gray).
- Lightness: It takes percentage value, where 100% represents white, while 0% represents black.
Syntax:
h1 {
    color:hsl(H, S, L);
}
Example:
- html
Output:

HSLA:
The HSLA color property is similar to HSL property, but the difference is HSLA contains A (Alpha) which specifies the transparency of elements. The value of alpha lies between 0.0 to 1.0 where 0.0. represents fully transparent and 1.0 represents not transparent.
Syntax:
h1 {
    color:hsla(H, S, L, A);
}
Example:
- html
Output:

Text Color: It is used to set the color of the text.
Syntax:
h1 {
    color:color_name;
}
Example:
- html
Output:

Background Color: It is used to set the background color of an HTML element.
Syntax:
h1 {
    background-color:color_name;
}
Example:
- html
Output:
Border Color: It is used to set the border color of an element. Border-style is used to set the border type.
Syntax:
h1 {
    border-style:solid/dashed/dotted
    border-color:color_name;
}
Example:
- html
Output:
List of Colors: Following is the list of a few CSS colors.
| Color Name | Hex(RGB) | Decimal(RGB) | |
|---|---|---|---|
| Red | FF0000 | 255, 0, 0 | |
| Pink | FFC0CB | 255, 192, 203 | |
| Orange | FFA500 | 255, 165, 0 | |
| Yellow | FFFF00 | 255, 255, 0 | |
| Violet | EE82EE | 238, 130, 238 | |
| Green | 008000 | 0, 128, 0 | |
| Aqua | 00FFFF | 0, 255, 255 | |
| Blue | 0000FF | 0, 0, 255 | |
| Brown | A52A2A | 165, 42, 42 | |
| White | FFFFFF | 255, 255, 255 | |
| Gray | 808080 | 128, 128, 128 | |
| Black | 000000 | 0, 0, 0 |
CSS Borders
CSS border properties allow us to set the style, color, and width of the border.
Note: Different properties can be set for all the different borders i.e.top border, right border, bottom border, and left border.
Properties of CSS Borders:
1. Border Style
- CSS border-top style Property
- border-right-style Property
- border-bottom-style Property
- border-left-style Property
2. Border Width
- border-top-width Property
- border-right-width Property
- border-bottom-width Property
- border-left-width Property
3. Border Color
- border-top-color Property
- border-right-color Property
- border-bottom-color Property
- border-left-color Property
4. Border individual sides
1. Border Style: The border-style property specifies the type of border. None of the other border properties will work without setting the border style.
Following are the types of borders:
- dotted – It describes a dotted border
- dashed – It describes a dashed border
- solid – It describes a solid border
- double – It describes a double border
- groove – It describes a 3D grooved border.
- ridge – It describes a 3D ridged border.
- inset – It describes a 3D inset border.
- outset – It describes a 3D outset border.
- none – It describes no border
- hidden – It describes the hidden border
Example:
- HTML
Output:

2. Border Width: Border width sets the width of the border. The width of the border can be in px, pt, cm or thin, medium, and thick.
Example:
- HTML
Output:

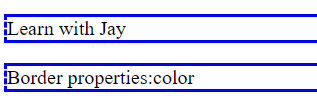
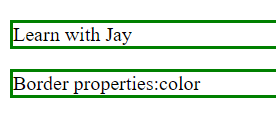
3. Border Color: This property is used to set the color of the border. Color can be set using the color name, hex value, or RGB value. If the color is not specified border inherits the color of the element itself.
Example:
- HTML
Output:

4. Border individual sides: Using border property, we can provide width, style, and color to all the borders separately for that we have to give some values to all sides of the border.
Syntax:
border-top-style : dotted;
border-bottom-width: thick;
border-right-color: green;
etc.
Example: In this example, we set border-top-style as dotted in h2.
- HTML
Output:

More Examples on CSS Border:
Example: In this example, we use border style, and border style property on the p tag.
- HTML
Output:

Syntax: If border properties have 3 values then:
border-style: solid dotted double
Solid:top border
Dotted: Left and right border
Double: bottom border
Example:
- HTML
Output:

Syntax: If border properties have 2 values
border-style:solid dotted
Solid:top and bottom border
Dotted: right and left border
Example:
- HTML
Output:
Syntax: If border properties have 1 value
border-style:dotted
Dotted:top, bottom, left and right border
Example:
- HTML
Output:
Example:
- HTML
Output:

CSS Margins and Padding
In this article, we will learn about the CSS Margin & Padding properties of the Box Model & understand their implementation through the example.
CSS Margins: CSS margins are used to create space around the element. We can set the different sizes of margins for individual sides(top, right, bottom, left).
Margin properties can have the following values:
- Length in cm, px, pt, etc.
- Width % of the element.
- Margin calculated by the browser: auto.
Syntax:
body {
    margin: value;
}
The margin property is a shorthand property having the following individual margin properties:
- margin-top: It is used to set the top margin of an element.
- margin-right: It is used to set the right margin of an element.
- margin-bottom: It is used to specify the amount of margin to be used on the bottom of an element.
- margin-left: It is used to set the width of the margin on the left of the desired element.
Note: The margin property allows negative values.
We will discuss all 4 properties sequentially.
If the margin property has 4 values:
margin: 40px 100px 120px 80px;
- top = 40px
- right = 100px
- bottom = 120px
- left = 80px
Example: This example describes the margin property by specifying the four values.
- HTML
Output:
If the margin property has 3 values:
margin: 40px 100px 120px;
- top = 40px
- right and left = 100px
- bottom = 120px
Example: This example describes the margin property by specifying the three values.
- HTML
Output:

If the margin property has 2 values:
margin: 40px 100px;
- top and bottom = 40px;
- left and right = 100px;
Example: This example describes the margin property by specifying the double value.
- HTML
Output:
If the margin property has 1 value:
margin: 40px;
- top, right, bottom and left = 40px
Example: This example describes the margin property by specifying the single value.
- HTML
Output:
CSS Padding: CSS paddings are used to create space around the element, inside any defined border. We can set different paddings for individual sides(top, right, bottom, left). It is important to add border properties to implement padding properties.
Padding properties can have the following values:
- Length in cm, px, pt, etc.
- Width % of the element.
Syntax:
body {
    padding: value;
}
The padding CSS shorthand property can be used to specify the padding for each side of an element in the following order:
- padding-top: It is used to set the width of the padding area on the top of an element.
- padding-right: It is used to set the width of the padding area on the right of an element.
- padding-bottom: It is used to set the height of the padding area on the bottom of an element.
- padding-left: It is used to set the width of the padding area on the left of an element.
Note: The padding property doesn’t allows the negative values.
We will discuss all these 4 properties sequentially.
If the padding property has 4 values:
padding: 40px 100px 120px 80px;
- top = 40px
- right = 100px
- bottom = 120px
- left = 80px
Example: This example describes the padding property by specifying the 4 values.
- HTML
Output:

If the padding property has 3 values:
padding: 40px 100px 120px;
- top = 40px
- right and left = 100px
- bottom = 120px
Example: This example describes the padding property by specifying the 3 values.
- HTML
Output:

If the padding property has 2 values:
padding: 100px 150px;
- top and bottom = 100px;
- left and right = 150px;
Example: This example describes the padding property using a double value.
- HTML
Output:

If the padding property has 1 value:
padding: 100px;
- top, right, bottom and left = 100px
Example: This example describes the padding property using a single value.
- HTML
Output:

Difference between Margin and Padding:
- Margin is used to create space around elements and padding is used to create space around elements inside the border.
- We can set the margin property to auto but we cannot set the padding property to auto.
- In Margin property we can allow negative or float number but in padding we cannot allow negative values.

- Margin and padding target all 4 sides of the element. Margin and padding will work without the border property also. The difference will be more clear with the following example.
Example: This example describes the margin & padding properties around the content.
- HTML
Output:


0 Comments